I discovered a great productivity perk a while back for my speaking audience that use dry erase markers on glossy photo paper. I just create easy to use tent cards that serve a dual purpose for my students. On one side of the folded tent they can write their name with a dry erase marker. The other side contains login information for my class. As a trainer, this has helped me get people logged in quicker and build rapport by visually learning peoples names as I walk around the room.
Taking the next step with this idea, I created three larger dry erase boards that work well for planning, decision making, and storyboarding. I’d like to make these available to you for free. These all print out on a sheet of glossy 8 x 12 photo paper, which is available at most one hour photo shops. I use Costco for my photo printing and I noticed that the 8 x 12 size prints better than 8 x 10 as it is a standard cut size. I suggest you experiment with one print first to make sure it works with your photo store. I’ve included 8×10 and 8×12 sizes below. In the U.S., Costco, Walmart and Walgreens stores all offer one hour photo printing at reasonable prices. Alternately, there are many online only photo stores that will work as well.
Here are three productivity boosters to get you started.
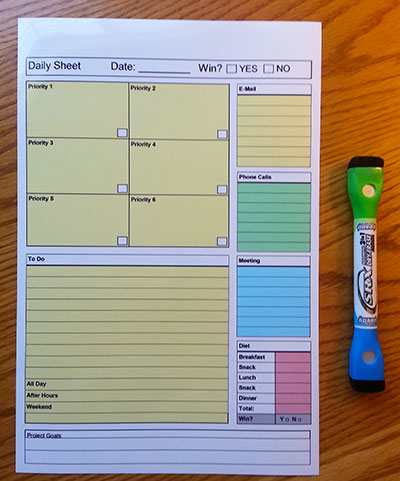
Productivity Booster 1: Daily Planner
For my first project, I took my popular daily planner and added color to the boxes and increased the size somewhat to fit nicely on a 8 x 12 print. I’ve left room at the top so you can clip this in a legal size clipboard which works nicely on the desktop.
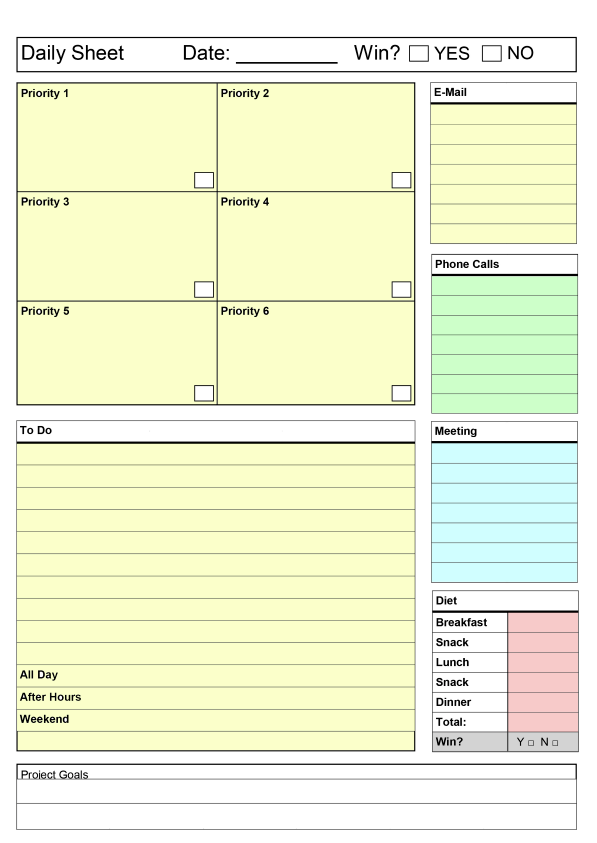
Fine tip dry erase markers let you quickly plan your day and create a quick to-do list. I’ve found this also works well on the side of my refrigerator (Held on with magnets) for a quick glance planner. By keeping topics simple and limited to a word or two, this planner is really quick and helps keep me on track on busy days, when I don’t have much time to plan.
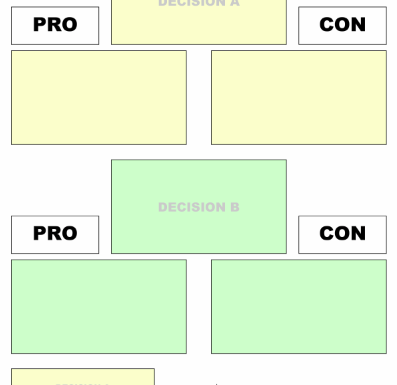
Productivity Booster 2: Decision Maker
Making decisions can be difficult. Visually looking at the consequences of your project ideas can help you make decisions quickly and with confidence. Here is what the decision maker looks like.

With fine tipped dry erase pens you can try an idea and quickly erase or modify it until you get an idea flow that works. Instead of working on paper which can be tough to modify, having the ability to cleanly erase ideas in a larger format works well with groups. I love using markers with erasers on the ends with this sheet. It’s fast and you can easily take a digital photo with your smartphone when you get the ideas just right.
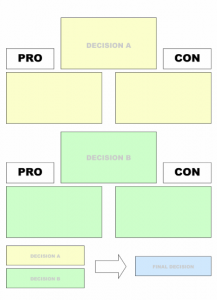
For multiple options, I have also included a two decision version with a final decision box at the bottom. This takes those really difficult to visualize ideas and puts them on one sheet where you can easily view the pros and cons.
Productivity Booster 3: Versatile Storyboard
As a writer, I’m always planning ahead in my stories. I love to visually storyboard ideas and see what works and what doesn’t. Sometimes I put up words, other times I create crude sketches. This usually requires a lot of changes and modifications. Using this dry erase storyboard has been wonderful.
I love planning out my fiction chapters with this powerful tool. I can’t tell you how many sheets of paper and time I’ve saved with this tool. I’ve kept this design simple so you can use it horizontally or vertically, depending if you are doing a story or a top down analysis.
Productivity Booster Instructions:
- Download the desired paper size zip file below
- Unzip the individual JPG files
- Copy them to a memory stick
- Take them to your local one-hour photo store
- Alternately: Upload them online to your photo store
- Upload the ones you want to print.
- Set the paper size to match the download size below (8×10 or 8×12)
- Select the quantity to print (I suggest printing one as a test first)
- Print them on Glossy Paper
- Use dry erase markers to fill them in.
Productivity Booster 8 x 10 Zip File
Productivity Booster 8 x 12 Zip File
Best Practices:
Printing and using these larger prints may take a little trial and error to get them right, depending on the photo machines available at the store. I’ve tested these extensively at my Costco store in the 8 x 12 size. My suggestion is to experiment with one print first and see if the photo comes out correctly on the desired paper size. Currently Costco charges $1.49 for each 8×12 print. Once you get the desired results, you can print the desired quantity. A good practice would be to talk with the person behind the counter and have them guide you through the process.
Some stores only offer the 8 x 10 size. Be sure to pick the 8×10 file download option. These jpg files come without the extra white space at the top and bottom. If you are printing at Costco, I would choose the 8 x 12 size, as I have had better results with these.
Dry erase markers come in fine tip and wide tip. For these documents I’ve found that the fine tip work better. Using a clipboard provides easy portability for your prints and will keep them looking good longer. Take a picture of your filled in documents and save them to Evernote for online digital storage.
NOTE: Do not use standard Sharpies as the ink is permanent and you won’t be able to remove it.
[Tweet “Download, Print, Plan… and Re-use”]
Overall:
I’d love to hear how these work for you in the comments below.